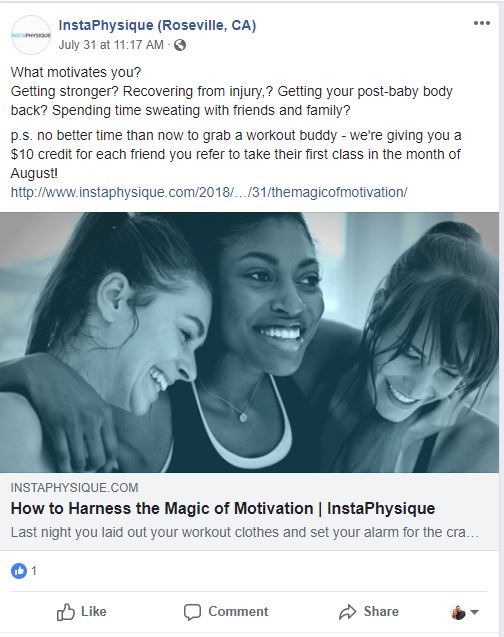
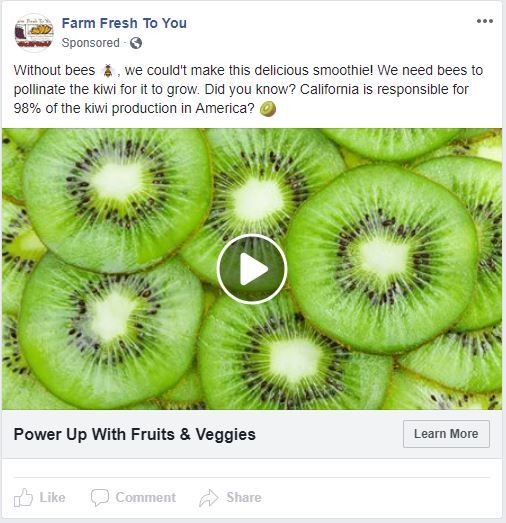
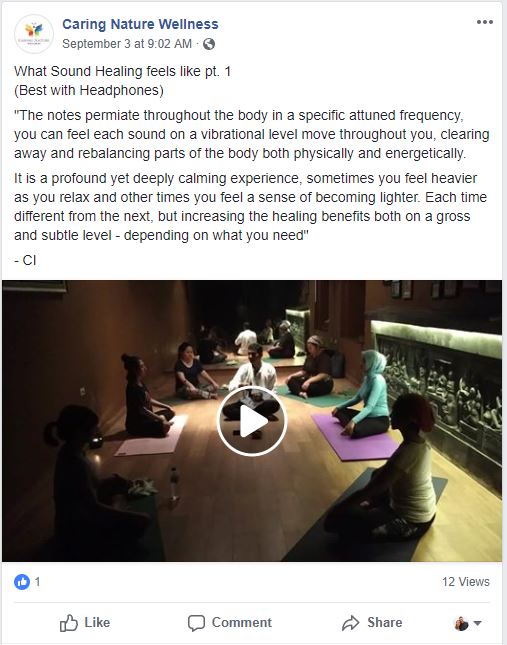
Recently, I came across a post in a Facebook group for Boss Moms (because yes, I am a Boss Mom too).
She was asking about boosting Facebook posts on her business page, which is something I’ve been doing recently, so it caught my attention.
She said:
“So I decided to Boost a post on my FB page to try it out. I paid $2, got 60 likes. As I was going through them to invite to my page, I noticed most of them were very similar names and 4 the same last name. All looked to be foreign names (nothing wrong with that but I can’t imagine so many Russian last names when I am targeting the Deep South). Does this sound odd to any of you?”
Many people told her that boosting posts is a waste of time and money, and she should just do ads.
I agree that Facebook ads are good, and often are the right solution.
But, boosting posts can also be an effective strategy, if you do it right, and make sure that you’re targeting the right audience.
If you just click that blue “Boost Post” button and tell Facebook to GO, you’re missing a big important step of reaching your target audience with that Facebook boost, and you’re probably not reaching the right people with your message.
Traffic is the act of putting your offer or message in front of your target audience.
This is a quote from the Digital Marketer Paid Traffic Mastery course I  completed recently, where I became a Certified Customer Acquisition Specialist.
But, I’ve also been getting a lot of hands-on experience recently with this concept by boosting my own Facebook posts, as well for a client I’m working with to build her new private yoga client business.
There are two parts to creating traffic for your page:
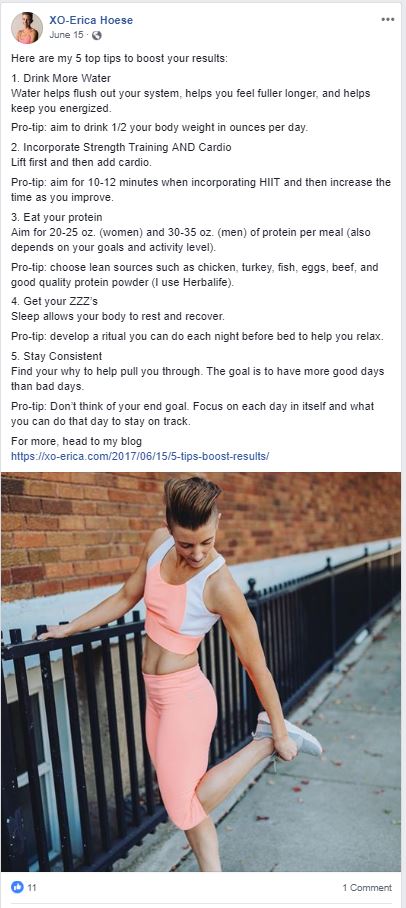
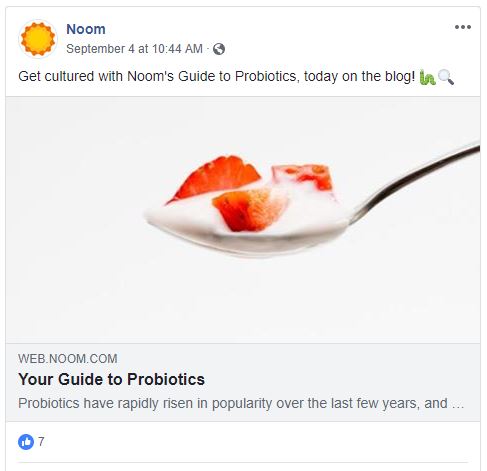
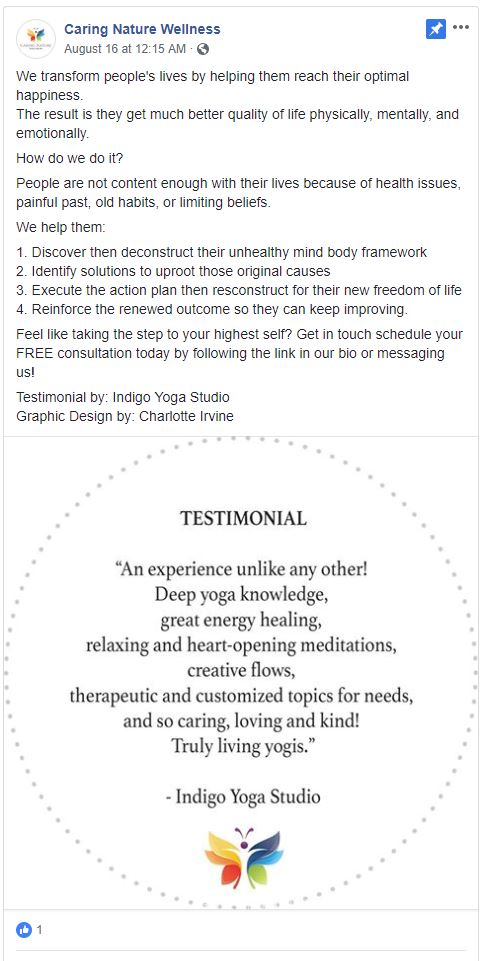
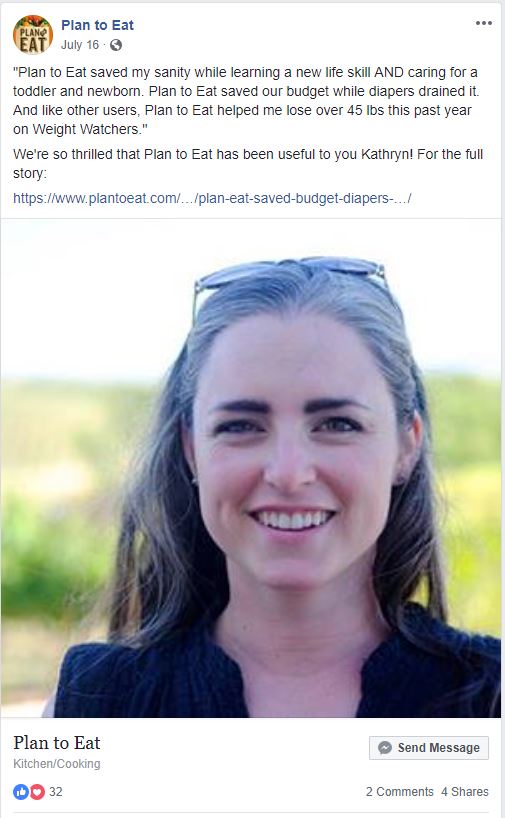
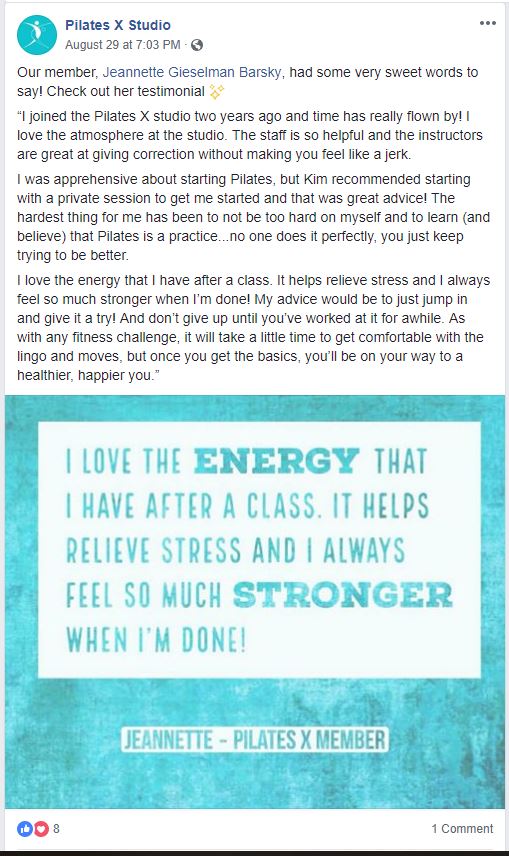
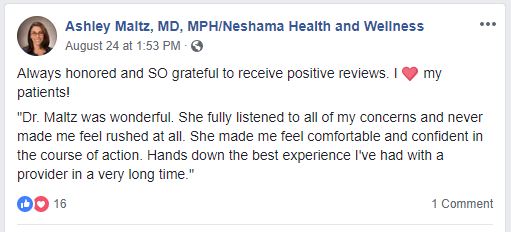
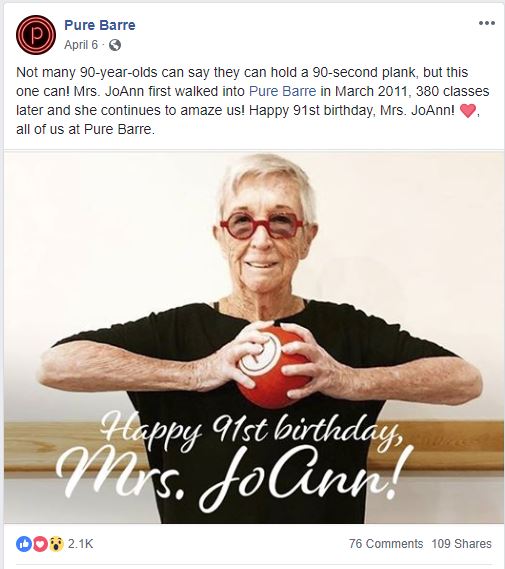
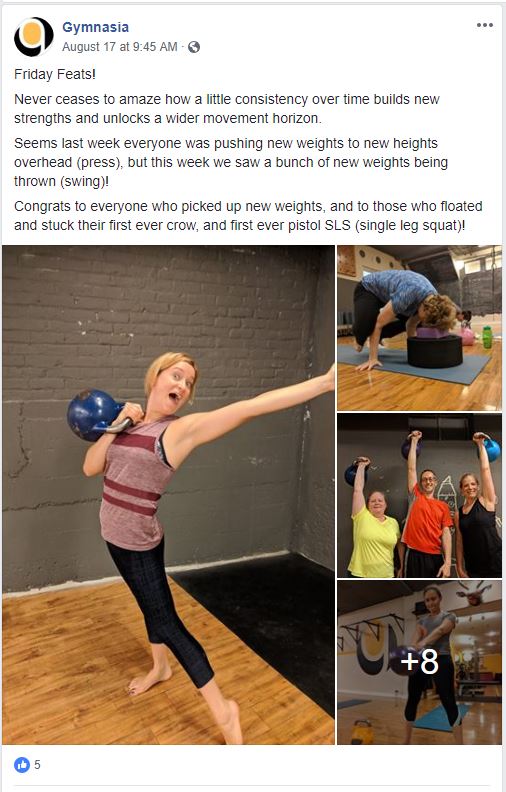
- Your Offer or Message: What you actually are saying to your audience (which I believe should be a combination of Edu-tainment, Customer Success Stories, and Offer Content).
- Your Target Audience: The people you’re actually trying to reach.
You need both pieces, otherwise you’re not going to get the traffic you need to grow your business with your content.
So, how do you figure out who your target audience is, and how do you create that audience in Facebook, so you’re boosting your posts to the right people?
5 Steps To Help You Actually Reach Your Dream Customers With Your Facebook Boosts
- Dream About Your Dream Customer
- Set Up Facebook Business Manager
- Create A Saved Audience
- Boost A Post To Your New Saved Audience
- Test It Out & Adjust As Necessary
Step 1: Dream About Your Dream Customer
Before you can dig into Facebook and create that audience, first you need to do some dreaming.
Honestly, this is the fun part. Do some dreaming, some brainstorming about who you want to work with.
Who do you want to serve?
Who do you want to help?
Get as specific with this as you can. It will help you later, I promise!
You can even name this person, if you’d like, and draw or find a picture of what you think your dream customer would look like.
It will help you to really visualize who you’re talking to when you’re creating content, and targeting your audience.
I’ve created a free worksheet to help you with this process. You can download it, fill it out, and then print it and post it up so you know who you’re trying to reach when you’re creating your Facebook audience later.
It can also help you when you’re creating content to share with your audience that they’ll appreciate. It may even help as you’re creating (or updating) your products or services for your customers.
Here’s what you should ask yourself about when you’re visualizing your dream customer:
Demographics:
- Age
- Gender
- Marital Status
- Number/Age of Children
- Location
- Occupation
- Job Title
- Annual Income
- Level of Education
- Any other details to note
Bonus: Write down a quote that you think your dream customer would say (or if you have a dream customer already, something that they’ve said to you before that sums up who this person is and what they need from you).
Goals & Values
- What are your dream customer’s goals?
- What are their values?
Sources of Information
- What kind of books does your dream customer read?
- Magazines or publications they read?
- Blogs or websites they read or follow?
- Organizations they belong to or conferences they attend?
- Tools or resources they use?
- Gurus they follow?
- Other?
Get specific with this section.
List actual books, magazines, blogs, etc. that you think your dream customer would read.
Don’t know? Then Google it.
Look on Amazon for the top rated books in your niche.
Search Google for top blogs in your industry.
Try to get as specific as you can with this section — I promise it will help you when you’re creating your audience later!
Challenges & Pain Points
- What are your dream customer’s challenges right now?
- What are their pain points?
If you don’t know, then start asking.
If you already have customers, ask them what their challenges are right now.
If you don’t have customers, then talk to people who could be customers of yours.
Start having conversations with potential clients and ask them what their challenges are and where they need help.
Join Facebook groups that your target audience would be a part of and start reading and commenting on people’s posts.
Google your target audience and see if you can find forums, LinkedIn groups, or just discussions online where people are asking questions about the kinds of things you’re trying to help with, and see what they’re saying.
Another useful tool for this research is the website Answer The Public. You can type in a search term, like “yoga,” for example, and see all the different things that people search for on Google with that term in it.
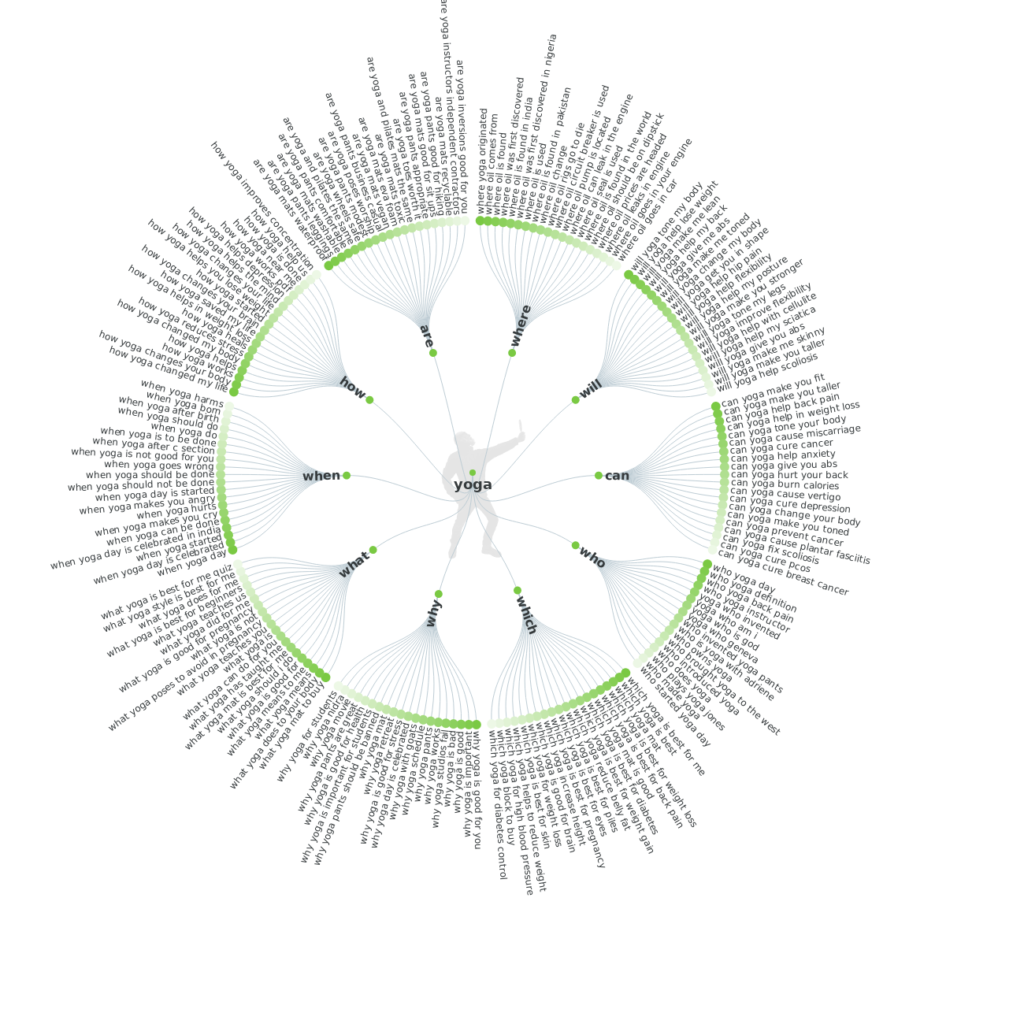
Source: https://answerthepublic.com/
Objections & Role In Purchase Process
- Objections to the sale
- Role in the purchase process
If you’ve had customers (or potential customers) before, then what have they said to you in the past about why they won’t buy?
If you haven’t, then what do you think an objection would be? Again, if you can actually start talking to real people, this helps a lot.
And, are they the decision-maker for making this purchase, or do you think they’d have to include someone else in their decision-making process (even a spouse or partner)?
Take some time to go through each of these questions.
Step 2: Set Up Facebook Business Manager
Okay, now we’re moving out of dream land, and down into the technical details.
First, you have to make sure that you have Facebook Business Manager set up for your Facebook Business Page.
And, even before that, you have to have a Facebook Business Page (not just your personal Facebook profile).
If your business is just getting started, and you don’t have a Business Page set up yet, you can follow these easy instructions from Facebook to get your Page set up:
Or, just start going through the Create A Page process on Facebook.
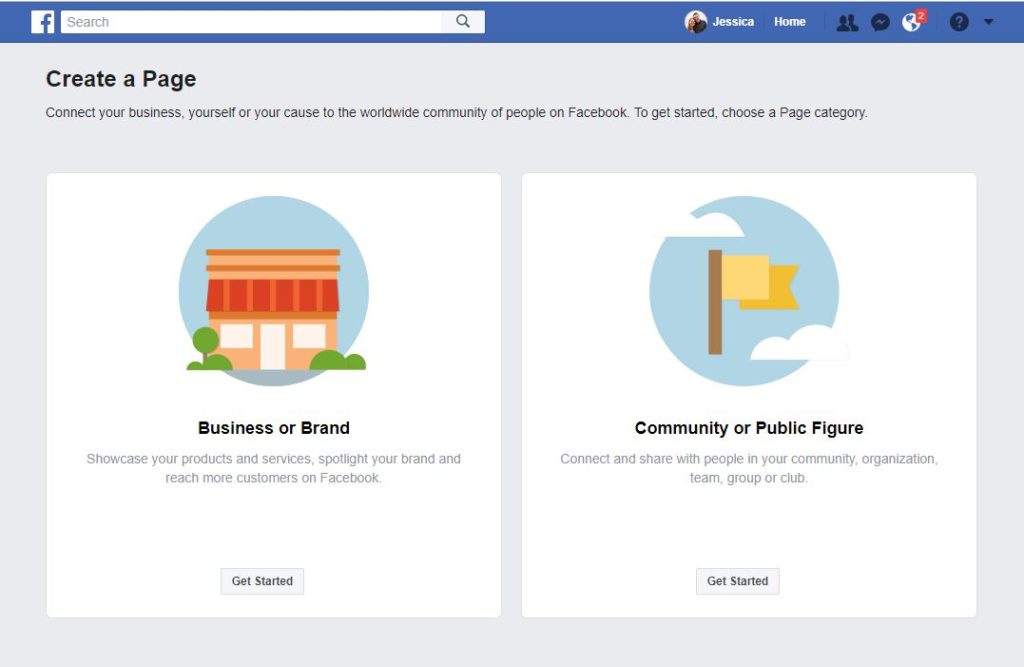
Once your Page is created, or if you already have a Facebook Page, next you’ll need to set up Business Manager.
Facebook also has easy to follow instructions to do that:
How Do I Sign Up For Business Manager?
Business Manager is just the back-end tool that you use to manage your Facebook Business Page, any ads you have going, and what you need to create an audience to target when you’re boosting posts.
If you’re planning on doing any kind of Facebook advertising or boosting of posts on your Page at all, it’s a good idea to get Business Manager set up for your Page.
To access your Business Manager account later, go to https://business.facebook.com.
If you happen to have multiple Facebook Pages (for multiple businesses, etc.), you can access each of them through Business Manager.
Once you log in to Business Manager, you’ll see each of your Pages that you have access to listed, and you can just choose the one that you want to go to.
Step 3: Create A Saved Audience
Now that you have your Business Manager account set up, it’s time to dig in and create that audience!
Go to https://business.facebook.com, and log in to your Business Manager account.
In the top left corner of the screen, click the menu bar that says “Business Manager.”
Then, under the “Assets” column, click “Audiences.”
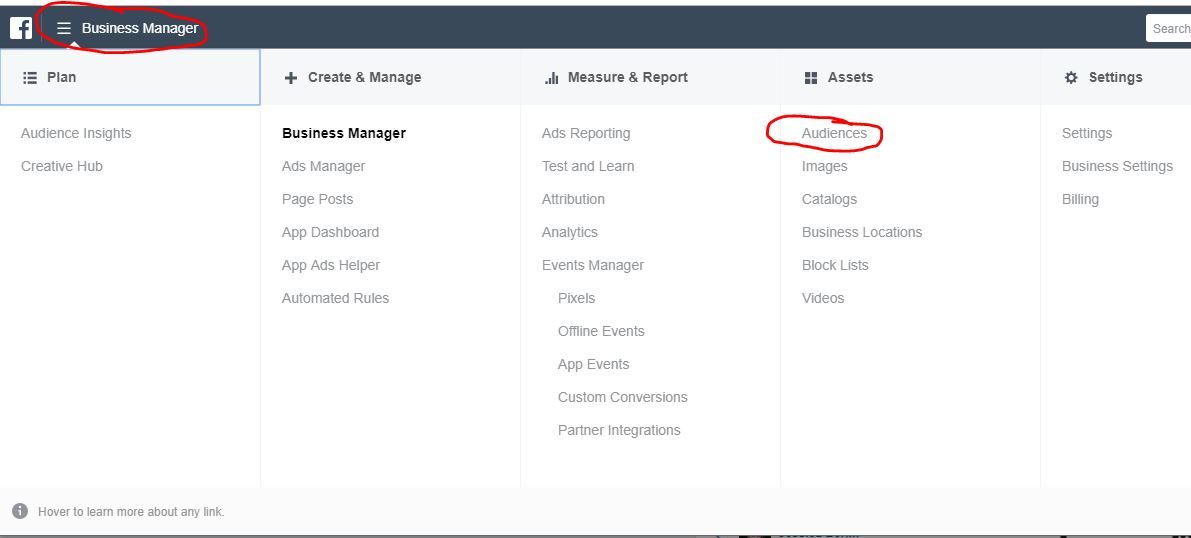
Once you’re in the Audiences screen, click the blue Create Audience button and then Saved Audience.

Then, you’ll get to the screen where you can actually create your Saved Audience, which looks like this:
Let’s go through each section…
Audience Name
 You can name your audience whatever you would like, but you may want to create a couple different audiences to test out, using different qualifiers and targeting.
So, you may actually want to save the audience naming until after you’ve done the rest of the targeting, so you know how to name the audience (based on who you’re actually targeting).
Custom Audiences
 For now, don’t worry about this section.
Custom Audiences are a different kind of audience, and not something you need to deal with right away.
They’re based on things like the people who have visited your website or a particular blog post on your website, or people who have engaged with you on your Facebook Page. You can even create an audience on Facebook from your existing email list too.
One side note about Custom Audiences …
If you’d ever like to retarget people that have been to your website before (aka, show an ad or boosted post to someone who’s shown an interest in you before), then you’ll need to make sure you set up a Facebook Pixel on your website.
Here’s a quick tutorial on how to set up your Facebook Pixel.
But, for now, don’t worry about it.
Put that on your to do list for later, if it’s something you’re interested in (or, if you’d like some help getting all of this set up, let me know — I can help!).
Locations
 If your business is local, like you’re a yoga studio or teacher that only teaches in a particular area, or your a chiropractor’s office, etc., then you’ll want to make sure you set your location to your local area.
If you are an online business or can reach a larger audience, you still may want to set at least countries that you’d like to serve (or that at least speak the same language as you!).
When I’m doing my Facebook ads and boosts, I often set my location to United States, Canada, and United Kingdom.
But, if you’re more local, you can also include your business address (or just the city you’re in), and then you can change the radius from that point (10 miles, 25 miles, etc.).
One other note about locations.
There’s a drop down menu at the top of the section that defaults to “People who live in this location.”
Most likely, that’s the option you want, especially if you have a local business.
The other options are:
- Everyone in this location
- People recently in this location
- People traveling in this location
If you want to include people who are traveling in your location, you may want to select one of those options.
Age, Gender, Languages
 Usually, I leave all of these options just as they are in the defaults (18-65+, all genders, and leave languages empty).
If you are targeting a specific age group or gender, you may want to change those.
Detailed Targeting
 This is the part where it starts to get interesting.
This is how you narrow your audience down by their interests, their employer, their job title, behaviors, school they went to, and SO many other things!
Go back to your Dream Customer worksheet that you completed in Step 1.
What are they interested in?
What do they do?
Where do they work?
What’s there job title?
What books (or authors) do they read? (Yes, you can even type authors in here!)
What tools or resources do they use?
Start typing things in to that Detailed Targeting box and see what comes up.
Not everything you type in there will be an option in Facebook, but many things will, so start trying things out and see what you come up with.
You may want to create a few different audiences that just include some of the features of your dream customer (rather than throw every single descriptor you could ever think of to describe your audience in here).
For example, I have a few different audiences that I’ve been trying out to reach my own dream customers.
I’m trying to reach yoga studio/business owners with my content, so I created an audience that includes all of the different types of yoga, as interests, that I could find in the detailed targeting listing (i.e. Yin Yoga, Bikram Yoga, Hatha Yoga, etc.) in the main Detailed Targeting section.
But, then, in order to try to reach business owners, and not just everyone in the world who is interested in some type of yoga, I click the link at the bottom that says, “Narrow Audience”.
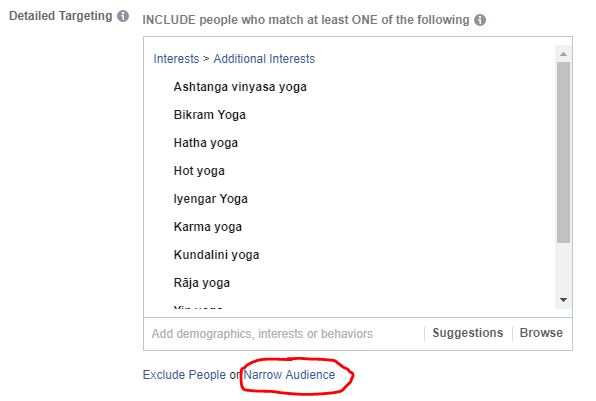
Once you click that button, then you have another box where you can type in more interests.
This is narrowing your audience — the people in your audience must match at least one of the interests from the first box AND they must also match at least one of the interests from the second box.
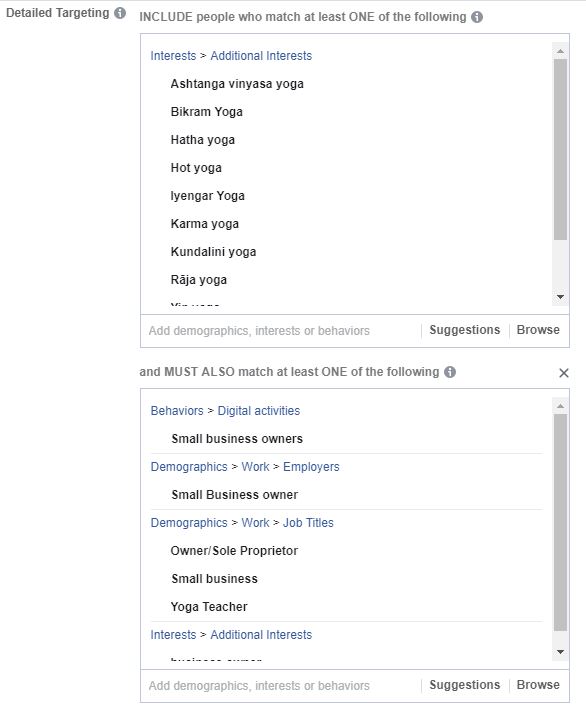
So, you want these things to be different — for example, I broadly targeted everyone interested in yoga, but then narrowed down to business owners, yoga teachers, yoga teacher training, etc.
This helps you focus your audience down to people who may actually fit your particular criteria for your dream customer.
Use your Dream Customer worksheet.
Who are you trying to reach?
How could your narrow your audience down further to really reach the people you want to talk to?
Once you have a couple interests typed in, you can also use the “Suggestions” button to help you find interests similar to what you have typed in already, which may give you some good ideas that you hadn’t thought of before.
As you’re creating your audience, Facebook will estimate the size of your reach in the top right of the Create Audience screen.
If you have a local business, your audience size will be largely dependent on the location you are targeting, and you may only want to include a few interests in your detailed targeting, because mostly you are just targeting the people in your local area.
But, if your business is online, and the location doesn’t matter, ideally your audience size should be between 500,000 to 3 million people.
That size will give you the best results and reach for your ads.
So, if you’re creating an audience and it starts to get too large, break up the interests into a couple different categories and create a couple different audiences from them.
You can always run ads or boost posts to several different audiences to test them out and then see which one performs the best.
Connections
 I don’t usually use this section at all, but it could be something to look into, especially if you already have a large following on your Facebook Page.
You can tell Facebook to either include (or exclude) people who like your Page, or friends of people who like your page, responded to your event on your Page, etc.
Depending on who you are trying to reach with your boosted posts or ads, you may test out this feature as well.
Remember, you can create and test out as many different audiences as you’d like.
There’s no limitation on the number of audiences you can create.
Just make sure to name them with a good description, so you can keep track of them, and then test them out and see what happens!
Step 4: Boost A Post To Your New Saved Audience
Once you have your audience created and saved, it will always be there when you go to boost a post from your Page!
When you have a post that you’d like to boost, go to your Page and click the blue “Boost Post” button under that particular post.
It will bring up this screen:
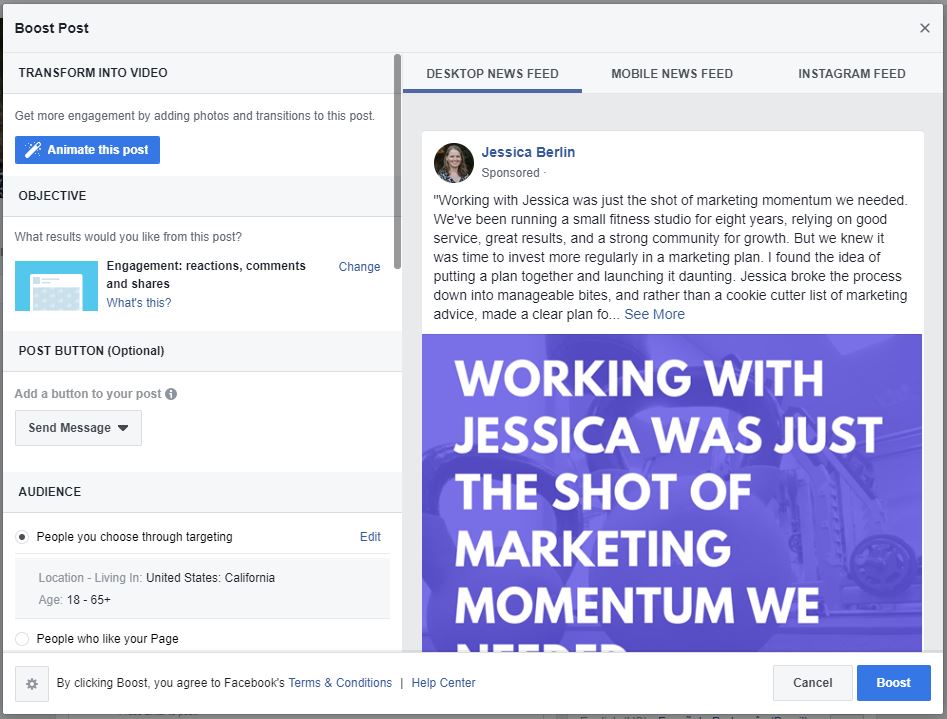
Let’s go through each section.
Objective/Post Button
The first thing you have to think about is what your Objective is for this boost.
Depending on the kind of post, you may have different options for your Objective in a boost.
The default for this one is “Engagement,” which means I want people to like, comment, and share my post.
If you have a link to your website or a blog in your post, then you may have an option to get clicks to your link.
Or, one other option is to get Messages, which means having people send you a message (through Facebook Messenger) who see the post.
So, choose your objective.
Then, you can include a button on your post, like “Send Message” or “Learn More,” if you would like.
Audience
Then, you get to the Audience section.
As you can see, the default for my post is to just boost to everyone in the United States, California, that’s 18-65+.
But, that is not my target audience.
So, I’m going to want to scroll down and choose which audience I want to boost this post to.
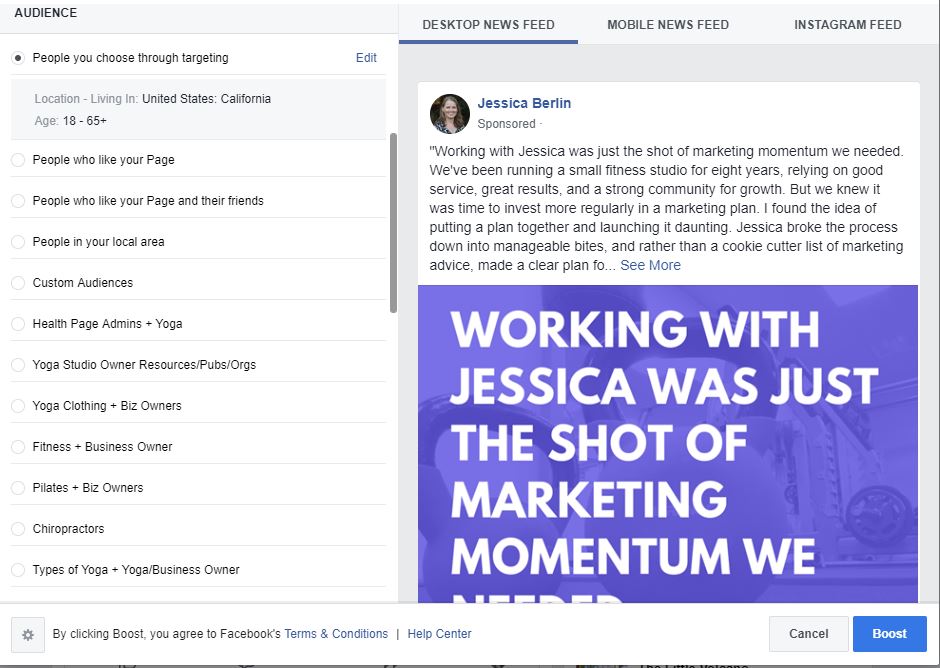
There are some standard audiences that Facebook includes for you, like People who like your Page, People who like your Page and their friends (this is a good one if you have a lot of people who like your Page already), and People in your local area.
But, if you keep scrolling (or you may need to click “See All”), you’ll be able to see your Saved Audience(s) that you created in your Business Manager in Step 3.
Select the audience that you want to boost your post to.
One other thing you can change is the Placements.
By default, Facebook selects “Automatic Placements” (which they recommend leaving on).
If you turn it off, you can choose where you want your post to show up — Facebook, Messenger, or Instagram.
If you don’t want it shown on Instagram or Messenger, you can unselect those options.
Budget and Duration
To start out, I would suggest boosting your post to your selected audience for $7 for 7 days ($1 per day).
This gives you a chance to test out your new audience for a pretty low investment and see how it performs.
If you’ve created a couple different audiences, you could boost the same post to both audiences (each for $7 for 7 days) and that would test out the audiences and you could see which one performs better.
Tracking Conversions
If you have your Facebook Pixel set up for your website (you should!), then make sure this is turned on and the correct Pixel is selected to use for tracking.
Payment
Make sure you have the correct Ad Account/payment method selected.
If you happen to have multiple Ad Accounts for different businesses (or, like me, you are included on Ad Accounts for your clients), just make sure you have the correct one selected before you boost your post.
After that, just hit that big blue Boost button, and you’re off!
Step 5: Test It Out & Adjust As Necessary
 You can see some basic information about your posts and boosted posts right from your Facebook Page.
When you’re on your Page, click the Insights button on the top bar, then click Posts in the left sidebar.
You’ll be able to see a list of all of your posts, along with the Reach (how many people saw your post) and Engagement (how many people liked, commented, shared your post).
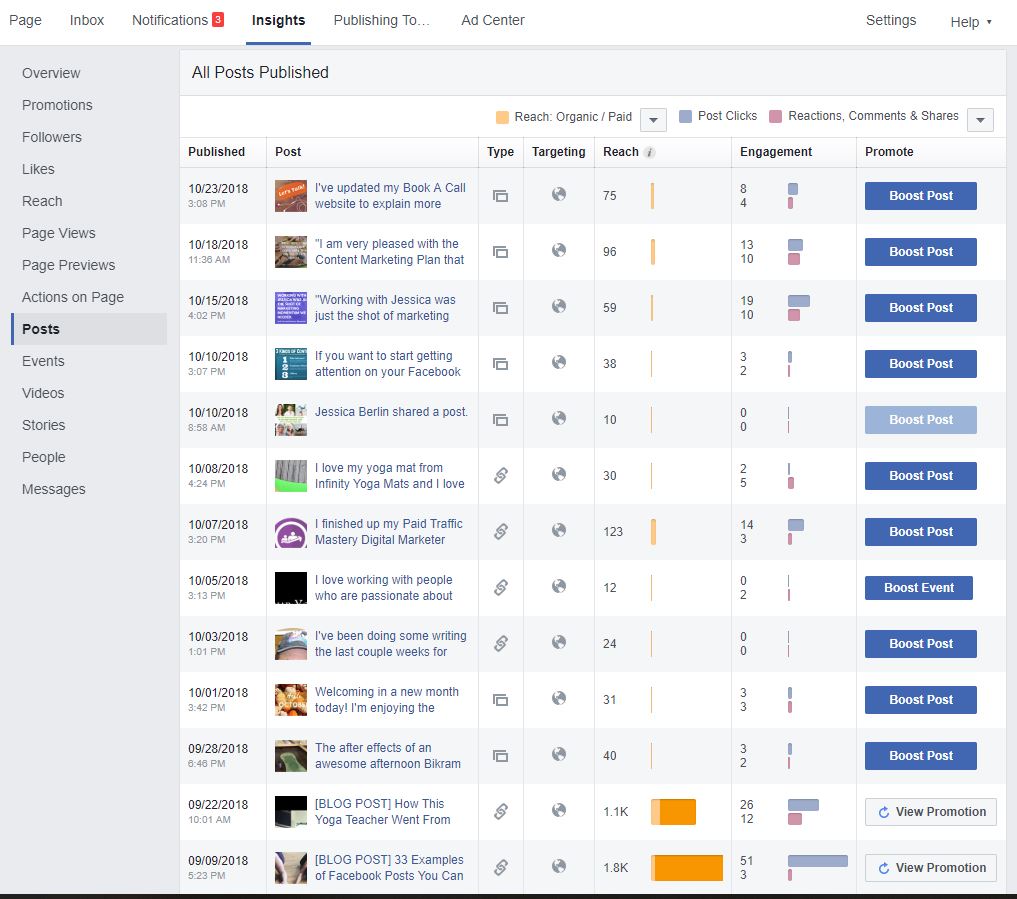 This may be enough information initially to test out different posts and audiences and just see how they do.
If you’d like to get more detailed about the performance of your boosts and your audiences you’ll need to log back into Business Manager and go to your Ads Manager.
Ads Manager has a lot of information and can be overwhelming, especially if you don’t know what you’re looking for.
But, a few things to take a look at include:
- Cost Per Result: You want this number to be as low as possible, especially if the result you are going for is link clicks — under $0.50 per click is great!
- CTR (Link Click-Through): This is your link click-through rate. You want this to be a high percentage, above 1% is good, but the higher the better.
- Relevance Score: This is a number from 1 to 10, and you want it to be as close to 10 as possible, but 7 or higher is good. You won’t get a Relevance Score until you’ve had at least 500 impressions on your ad, so it may take a while to get a Relevance Score, depending on your audience size and your budget. But, this is a good number for testing the quality of your audience — it tells you how relevant the audience you’re advertising to thinks the content you’re sharing is to them. So, it can tell you if you’re advertising to the right audience or not.
Feel free to test out different audiences, different post boosting, and see how things go.
Recap
You CAN start reaching your dream customers, even with boosted posts on your Facebook Page!
You just need to make sure you set up your audiences in Facebook, and don’t just use the defaults when you boost your posts.
There are five steps to do this:
- Dream About Your Dream Customer: Who are you trying to reach? Write it down. Use my free Dream Customer worksheet to help you figure it out.
- Set Up Facebook Business Manager: Create your Facebook Page and get Business Manager set up (if you haven’t already).
- Create A Saved Audience: Go through the steps I listed above to create your Saved Audience (or more than one, if you want to test out different options). Use the details you included in your Dream Customer worksheet to help you with the detailed targeting.
- Boost A Post To Your New Saved Audience: Go back to your Facebook Page, share content, and choose a post to boost. Make sure you select that Saved Audience you created, rather than the defaults that Facebook chooses for you.
- Test It Out & Adjust As Necessary: Let your boosted post run for 7 days ($1/day) and see what happens. What kind of reach and engagement did you get? If you want to get more detailed, check out Ads Manager (within Business Manager) and look at your Cost Per Result, CTR, and Relevance Score.
Need Help?
If this all still seems like too much for you, or if you’d rather focus on the parts of your business that you love and let someone else handle Facebook for you, then I can help!
I love getting into all the nitty-gritty detail of Facebook audiences, posts, boosts, and ads, and I would love to help you bring in more of your dream customers through your Facebook content and boosts!
I help health and wellness businesses consistently bring in new clients every month using Omnipresence Content Marketing.
Let’s schedule a call to talk about your business and the challenges you’re facing right now.
If you would like your business to become Omnipresent to your dream customers, let’s schedule a call today.


